The practical guide
Asymmetri Motion Tutorial
From your first video to a useful conversation with a coach. Follow the steps in order, or jump straight to the part you need.
01 / Start
One pitch. Evidence you can revisit.
You choose the video, confirm the moments and decide what to examine. Motion keeps the saved pitch and its evidence together.
Step 1.1
The path through a pitch
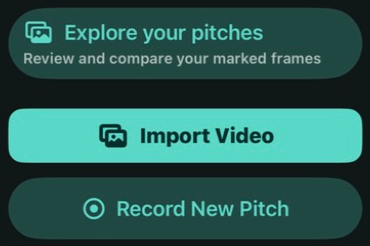
Start in My Pitches. Choose Record Pitch for a fresh recording, or Import Video for a video already in Photos. The recording button says Record New Pitch when you already have a pitch.
- Record or import a video.
- Confirm Camera View and Throwing Arm.
- Mark the required moments, one exact frame at a time.
- Choose Analyze Pitch.
- Open a result and inspect its evidence.
- Reopen the saved pitch or explore your history.
Step 1.2
What you need
Use an iPhone running iOS 17 or later. Direct recording needs a supported high-frame-rate rear camera mode. Import is also a first-class path into the same review workflow.
Keep the full pitcher visible, with enough light and space for the delivery. A steady camera and clear landmarks make review more useful. Athlete Profile is optional; you can start with a video.
Results are projected 2D measurements from video images. They are not 3D anatomy, injury predictions, ball velocity, mechanics grades or automatic coaching. A coach supplies the context.
Link to this step02 / Record or Import
Start with a clear video.
Choose your acquisition path below. Both paths create a saved pitch that you can review in the same way.
Step 2.1 · Record · Back View
Back View: behind the pitcher
In My Pitches, choose Record Pitch (or Record New Pitch), then Back View. Position the phone behind the pitcher, looking toward the throwing target. Portrait orientation is recommended.
Keep the phone steady and outside the throwing path. Leave space around the head, throwing hand and both feet throughout the delivery. Check the actual camera preview before starting.
Link to this step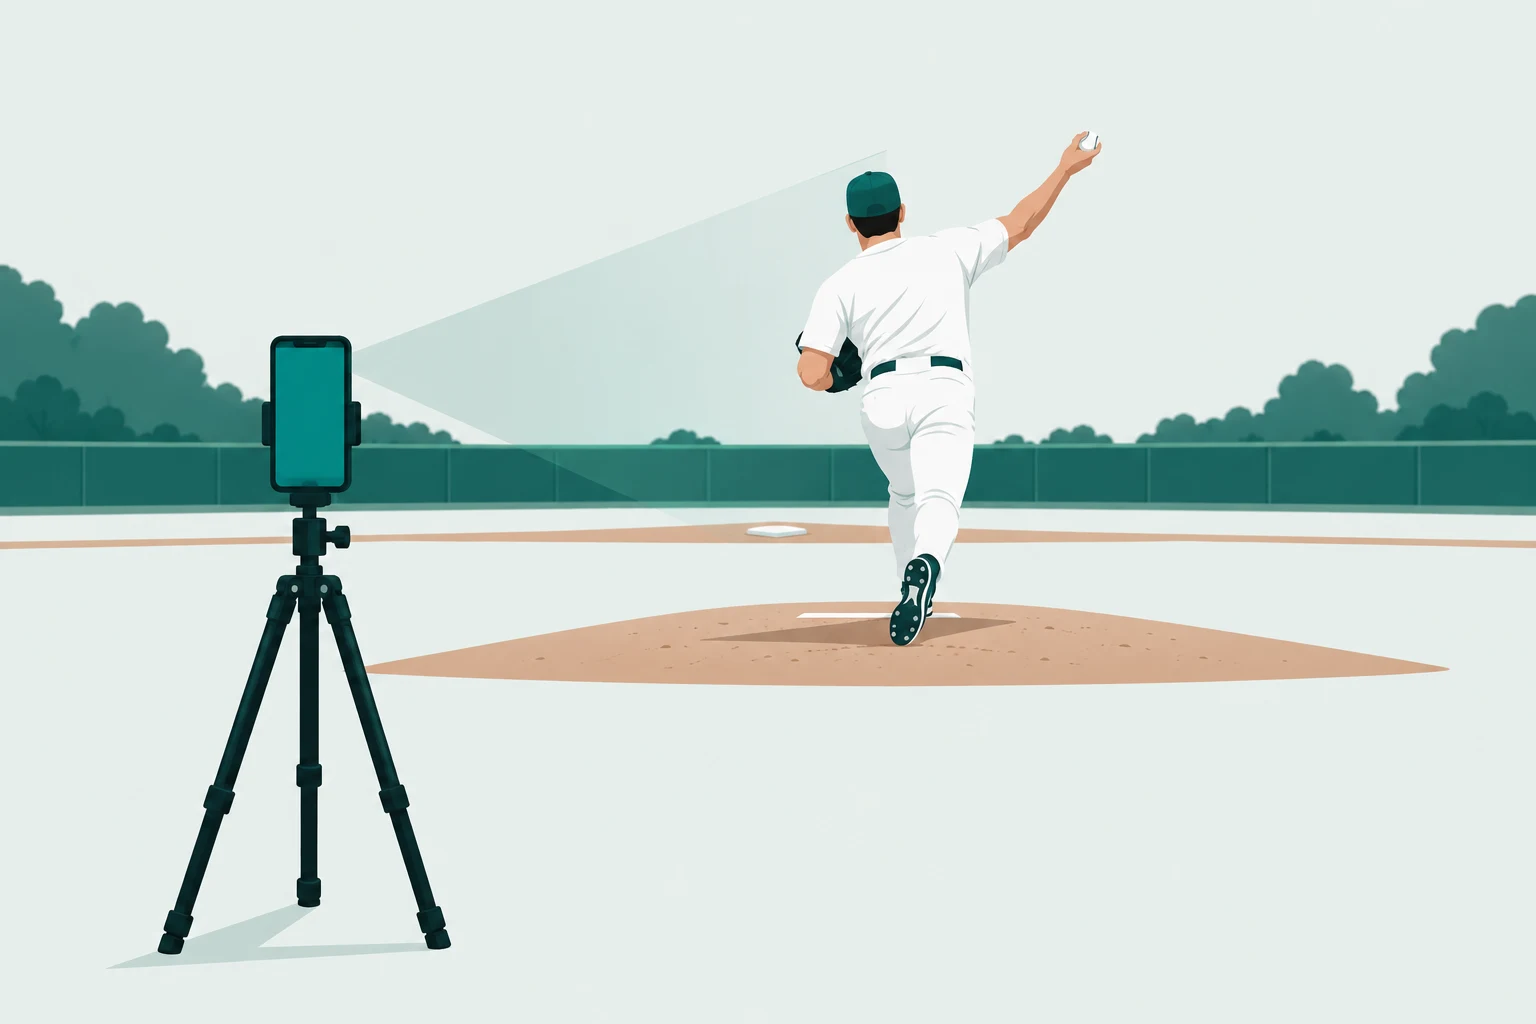
Step 2.2 · Record · Side View
Side View: beside the pitcher
Choose Side View and position the phone beside the pitcher, looking across the delivery. Landscape orientation is recommended. Orientation is guidance, not a calibration step.
Include the clear starting stance and the whole stride through release. Keep the nose, both ankle/foot regions, throwing arm and full body visible. Avoid moving or zooming the camera between the starting stance and Front Foot Contact.
Link to this step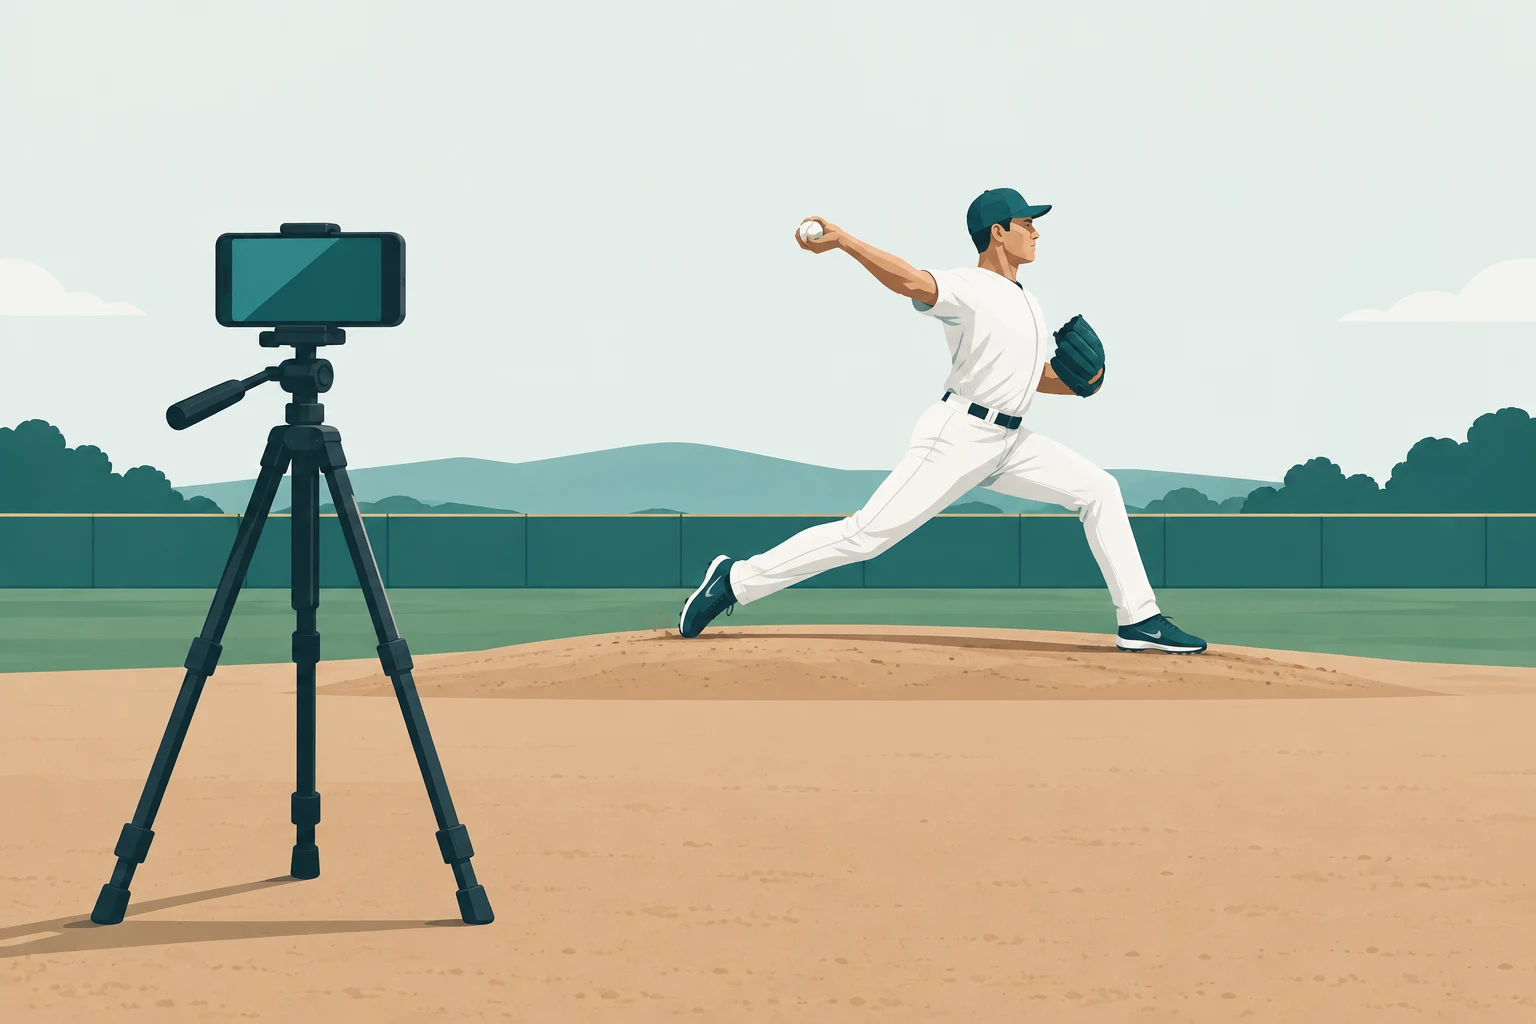
Step 2.3 · Record
Use the guide to keep room around the pitcher
Use Show Guide or Hide Guide in the capture controls. The rectangle and dashed centre line help you compose the recording. Keep the full delivery inside the usable image; the guide does not detect the pitcher or measure physical distance.
The preview uses the rear wide camera at fixed 1×. Motion prefers a supported 240 fps format, with 120 fps as the fallback. Available modes depend on the iPhone. If no suitable mode is supported, use Import Video.
Link to this step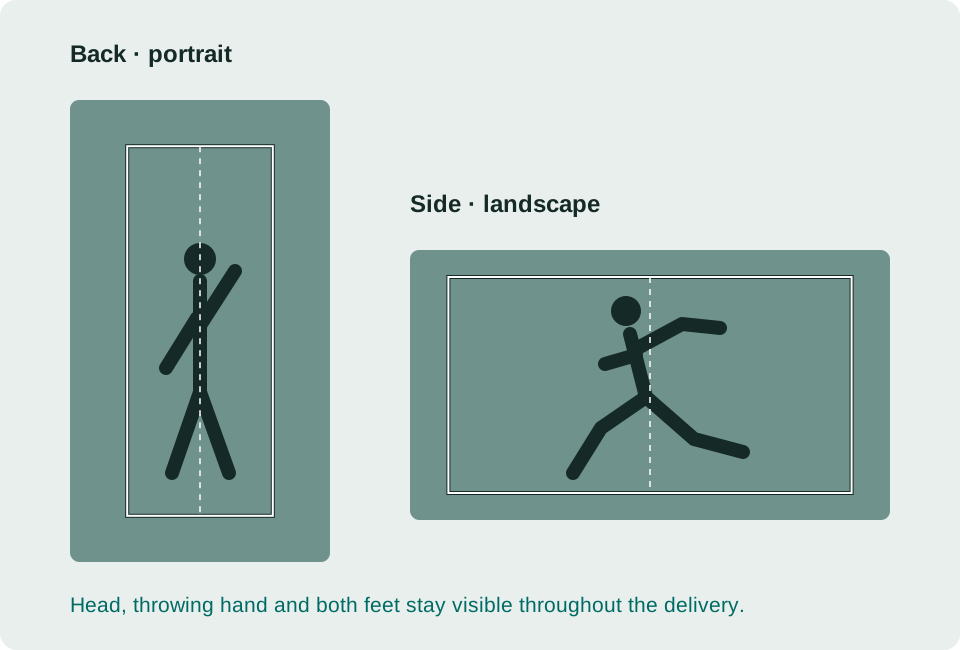
Step 2.4 · Record
Optional: save a Recording Setup
Open the capture details menu to use Recording Setup. Save New Setup remembers the selected view and guide visibility. You can give it a name, return to it later, edit it or delete it. Recording without a saved setup is fine.
A setup can specify Back View, Side View or Use Video Shape. Reusing it supplies app preferences for a new recording. You still need to put the phone in the intended physical position and check the preview each time.
A saved Recording Setup does not store or reproduce the tripod position, camera perspective, distance, lens, zoom or frame rate. It does not calibrate measurements or change previously saved pitches.
Link to this stepStep 2.5 · Record
Record, stop, wait for the saved pitch
Allow Camera access when asked. Start with the red recording control, record the delivery, then use the stop control in the same place.
Wait while the video finishes saving. The pitch is saved locally in the app; the Photos copy is a separate step. If that copy fails, a successfully saved app pitch remains in My Pitches. Follow the message on screen before retrying.
Direct recordings are video-only. An imported original may contain audio.
Link to this step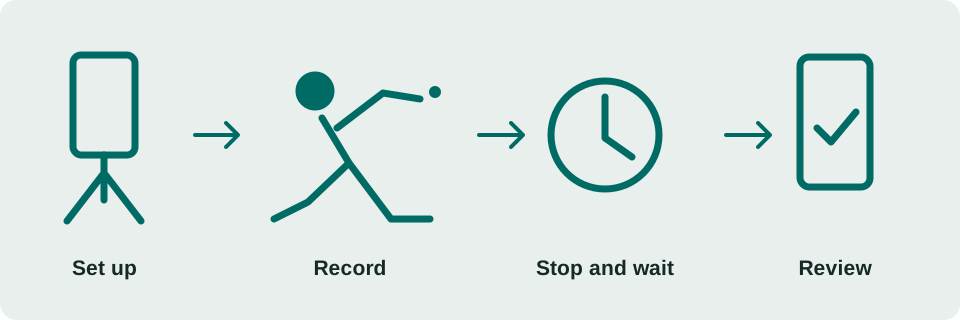
Step 2.6 · Import
Import an existing video
From My Pitches, choose Import Video and select the original pitching video in Photos. With limited Photos access, include that video in the items the app can access.
If the original is in iCloud, allow it to download and keep enough free storage for the local copy. Wait for import to finish, then open the saved pitch.
If the same Photos item is already imported, Open Existing Pitch returns to that observation. Use as New Pitch intentionally creates a separate observation with its own review history. This is a choice about that Photos item, not a search for all visually similar clips.
Link to this step03 / Set Up the Pitch
Confirm what this video shows.
Setup belongs to each saved pitch. Review the actual recording, even if a saved setup or profile supplied a starting value.
In this module · 3 steps
Step 3.1
Confirm Camera View
Choose Back View for a camera primarily behind the pitcher, looking toward the target. Choose Side View for a camera beside the pitcher.
An imported video's shape can suggest a starting choice, but portrait or landscape alone does not establish the real camera position. Correct it if needed. Other / Not sure has no supported normal measurement results.
Choosing a view does not calibrate the camera. Each video is analyzed independently; Motion does not combine Back and Side recordings into a 3D view.
Link to this step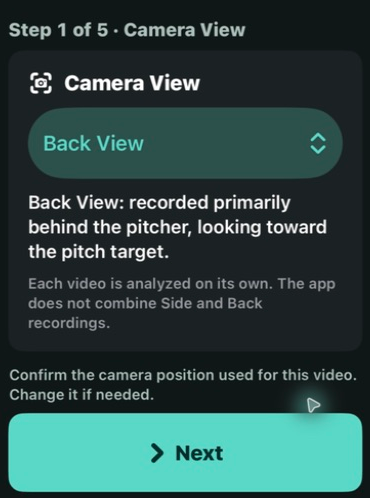
Step 3.2
Confirm Throwing Arm
Select Right, Left or Unknown for the pitcher in this video. Use the arm that throws the ball, not the side where it appears on screen.
Unknown is allowed. Results that depend on throwing arm remain unavailable, while independent results can still be analyzed. A profile default helps with new pitches; it does not rewrite the saved choice on older ones.
Link to this step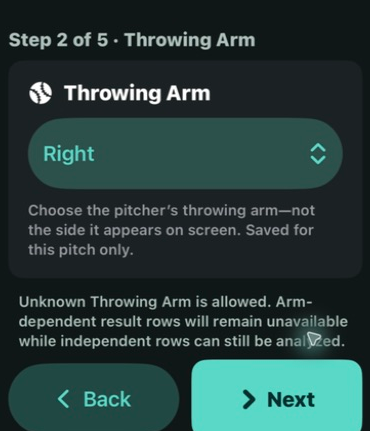
Step 3.3
Return with Review Pitch Inputs
Use Next and Back to follow the Guided steps. Back View continues to Front Foot Contact and Ball Release. Side View includes Setup Reference first.
From a saved pitch, Review Pitch Inputs takes you through the same sequence. Existing values and marks remain saved until you explicitly change them. After changing an input, check Results and choose Analyze Pitch when you want to update the affected analysis.
Link to this step04 / Mark the Moments
Find the frame. Then confirm it.
You identify the important moments. The selected sample and the saved mark are separate until you use Set or Move.
Step 4.1 · Side View
Side View: mark Setup Reference first
Find the latest clear starting-stance frame before the visible forward stride begins. The nose, both ankle/foot regions and full body need to be visible, with consistent framing through Front Foot Contact.
Confirm the exact frame with Set Setup Reference. It must precede FFC. This is a reference image for the Side-view ankle-span ratio, not an extra pitching event or a physical height calibration.
Link to this stepStep 4.2
Mark Front Foot Contact (FFC)
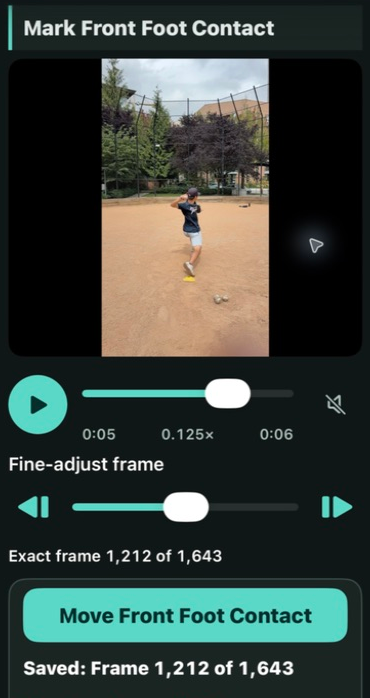
Look for the earliest visible frame where the lead foot or its footwear contacts the surface after the stride. The lead foot is the foot that lands toward the target.
Use playback and the coarse scrubber to get close. Pause, then use Fine-adjust frame or the previous/next frame controls to inspect nearby samples. Wait for the exact frame to finish loading before confirming.
- Check the exact-frame number and the image together.
- Release the slider before using Set Front Foot Contact.
- For an existing mark, Move Front Foot Contact replaces its location only when you confirm.
- Use Go To to revisit an existing saved mark without changing it.
Step 4.3
Mark Ball Release
Continue to Ball Release. Find the earliest visible frame where the ball is spatially separated from the throwing hand. Use the same coarse and fine controls, then Set Ball Release.
If the ball or hand is obscured, inspect nearby exact frames carefully. Do not treat a blurred guess as a precise event. Better source footage may be needed. Motion does not make an authoritative automatic event choice for you.
Set / Move is unavailable while dragging or loading an exact frame. Changing a mark can make affected results out of date; explicit Analyze Pitch updates eligible results. Old analysis history is retained.
Link to this stepStep 4.4
If more than one person is visible
When Motion asks for Pitcher Selection, identify the intended pitcher in the image. Draw or adjust the region around the expected delivery area, or choose the intended numbered candidate when offered. Make the selection conclusive before saving.
Use Edit to revise the region or Clear to remove it. Then explicitly retry analysis if requested. A selection can fail if the intended person's landmarks are not clearly detected; selecting a region does not manufacture missing landmarks.
Pitcher Selection is spatial subject disambiguation. It is not face recognition, verified athlete identity or cross-frame tracking.
Link to this step05 / Analyze
Turn the confirmed inputs into results.
Analysis is an explicit action. Available results depend on view, marks, throwing arm, pitcher selection and visible landmarks.
Step 5.1
Choose Analyze Pitch
At Results, check the Pitch Mechanics summary and choose Analyze Pitch. Let processing finish, then read the state of each result.
Motion performs pose analysis on device. Eligible measurements can finish independently: one unavailable result does not mean every other result failed. Opening Results alone does not run a new analysis.
Link to this step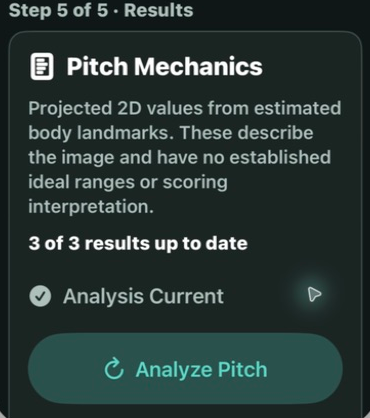
Step 5.2 · Back View
Back View: three supported results
These are measurements projected in the video image. Each belongs to a particular marked event.
- 2D Trunk-Segment Orientation at FFC: the trunk segment relative to image vertical, including the displayed direction.
- 2D Shoulder-Upper Arm Angle at Ball Release: the included angle formed by the shoulder line and throwing upper arm in the image.
- 2D Throwing-Side Shoulder-Wrist Orientation at Ball Release: the shoulder-to-wrist direction relative to image vertical.
Image vertical is not ground or gravity vertical. Camera roll and perspective affect these values. They do not establish anatomical joint angles or arm slot.
Link to this step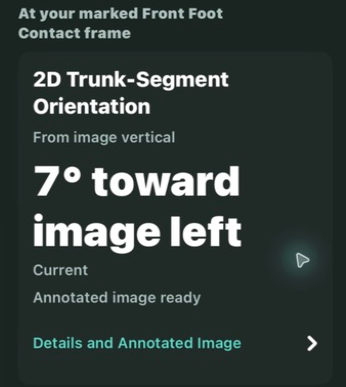
Step 5.3 · Side View
Side View: three supported results
Side View uses the marked starting stance and events where each measurement requires them.
- 2D FFC Ankle-Span Ratio: projected ankle separation at FFC relative to the projected nose-to-ankle reference from Setup, expressed as a percentage.
- 2D Lead-Knee Bend Angle at FFC: projected bend from the estimated lead hip, knee and ankle.
- 2D Lead-Knee Bend Angle at Ball Release: the same kind of projected bend at the separate release event.
The ratio is not physical stride length or percentage of actual body height. These Side-view descriptors remain experimental; availability in the app does not establish scientific accuracy or an ideal range. Higher or lower is not a score.
Link to this stepStep 5.4
Read the status before the number
Current results correspond to the saved inputs. If an input changed, review the affected result's status and analyze again. If a result is unavailable, follow its reason: missing marks, unknown throwing arm, ambiguous pitcher selection or missing landmarks may need attention.
A failed new attempt does not make an older saved result a new success. Review the event, context and currentness before comparing values. No number is better than a number inferred from evidence that is not there.
Link to this step06 / Inspect Evidence
A result should lead back to its evidence.
Use Details and Annotated Image to understand what contributed to a displayed value.
Step 6.1
Check the frame and its references
Open the result's evidence. Check that the marked event, camera view and intended pitcher match what you meant to analyze.
Inspect the estimated landmarks and reference lines against the visible body. Read the projected value in that image's context. The ankle-span ratio uses two source frames, Setup and FFC; inspect both.
The overlay makes the calculation inspectable. It does not guarantee that a pose estimate is correct. Occlusion, blur, perspective and event selection can change the result.
Link to this step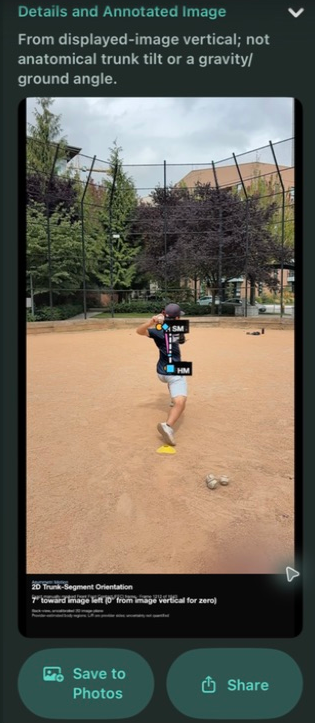
07 / Saved Pitches
Return to the original observation.
My Pitches is your local library. A saved pitch keeps its own video, setup, marks and analysis history.
Step 7.1
Open a saved pitch
Return to My Pitches and use the thumbnail and date to find the observation. Open it to revisit Results, evidence or Review Pitch Inputs. Use the saved mark's Go To action when you want to inspect its frame.
Pitch Date can come from the source or a date you specify. An Added date means when the video entered the app, not necessarily when the pitch was thrown. Keep that distinction in mind when exploring development over time.
Link to this stepStep 7.2
Understand what is local
Two imports kept as separate observations have separate review histories. Changing one does not turn it into a revision of the other.
Deleting a pitch removes that app observation and its local video, marks, analysis and evidence. It does not delete an independent Photos copy or the Athlete Profile. Use deletion only when you intend to remove that observation.
Deleting or reinstalling the app can remove local history. A Photos video or exported evidence image does not restore the complete app record. Contact support before deleting or reinstalling as troubleshooting.
Link to this step08 / Explore History
Ask a question of your saved pitches.
Choose Explore your pitches from My Pitches. Review marked frames for a visual question, or Measurement history for a numerical one.
In this module · 11 steps
- Choose frames or measurements
- Review the same event across pitches
- Choose A, then choose B
- Inspect the pair and open the originals
- Choose one measurement
- Chart: locate an observation
- Table and Evidence: inspect the contributors
- Choose the question
- Narrow the recorded context
- Set the date window
- Save a question you want to revisit
Step 8.1
Choose frames or measurements
Review marked frames lets you revisit the exact moments you confirmed, including pitches without a usable measurement. Measurement history uses supported saved results and their evidence.
Link to this step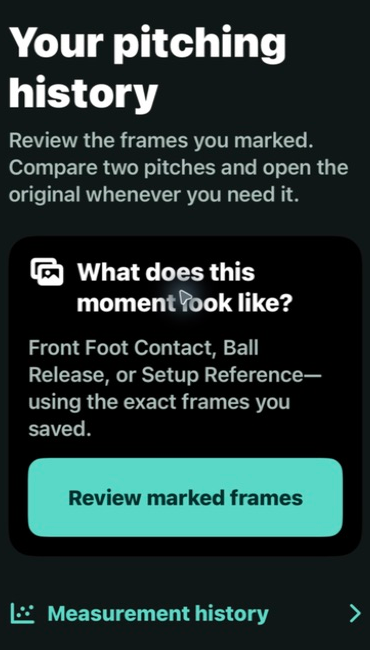
Step 8.2
Review the same event across pitches
In Review marked frames, choose Front Foot Contact, Ball Release or Setup Reference. Switch between List and Frames. The count tells you how many included pitches have a saved mark for that event.
Open a row or Show frame to inspect the exact saved image. Change the date and context filters when you want a narrower set.
Link to this step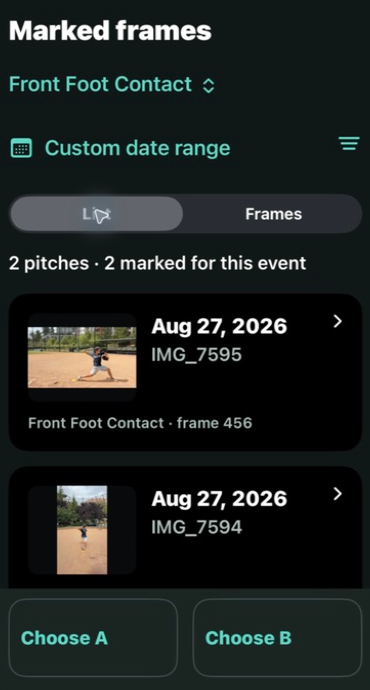
Step 8.3
Choose A, then choose B
Use Choose A and Choose B to select two different pitches with the matching marked event. Replace either side to try another pair. The choices are temporary unless you save the view.
Link to this step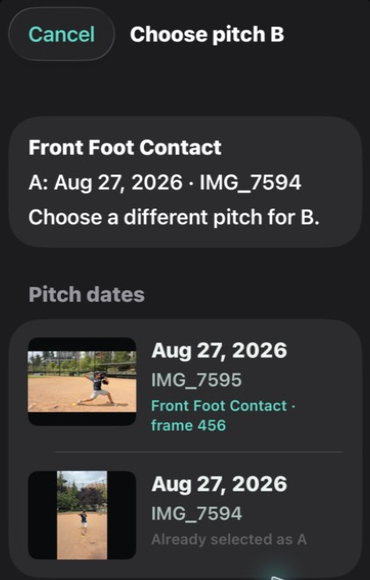
Step 8.4
Inspect the pair and open the originals
Auto, Side by side and Stacked change the layout while preserving each image's proportions. Tap a frame to enlarge it and use Done to return.
Open A or Open B returns to the original saved pitch. Use Back to return to the comparison. Select another matching event when both pitches have the needed mark.
Compare framing before comparing movement. Different camera positions, views or marking decisions can create visual differences. A side-by-side layout does not make the recordings equivalent.
Link to this step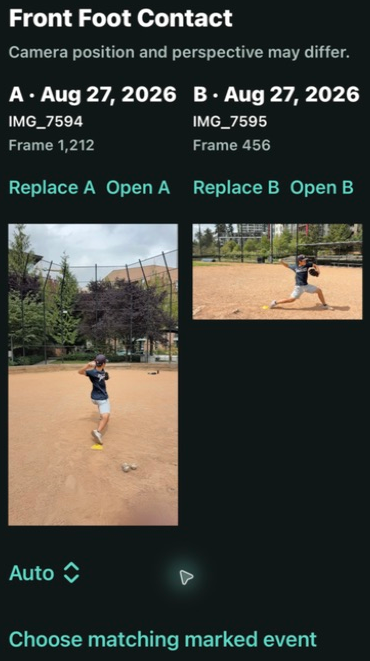
Step 8.5
Choose one measurement
Open Measurement history and choose a supported measure. The same six normal results described in Analyze are available where saved records exist. An empty history can simply mean that no included pitch has an eligible result for that measure.
Link to this step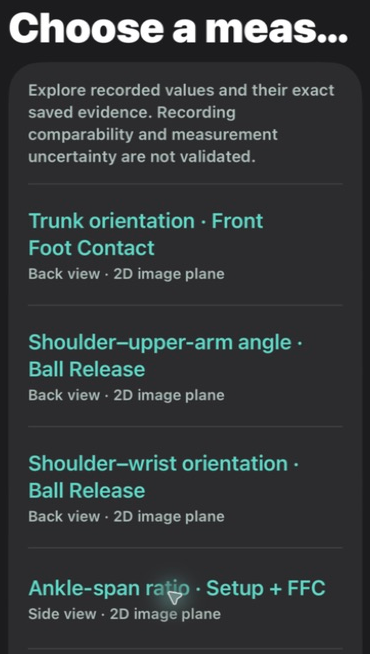
Step 8.6
Chart: locate an observation
Use Chart to see the included recorded values across pitch dates. Touch a plotted item, or use Previous / Next, to choose an observation.
Read the included count and context before interpreting the pattern. Large histories may be summarized into date bins; inspect the contributors and ranges instead of treating a summary as a new pitch.
Link to this step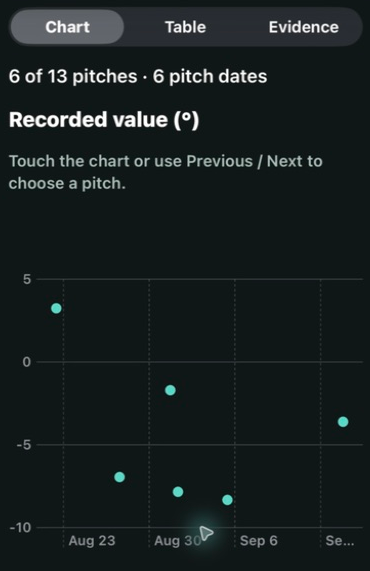
Step 8.7
Table and Evidence: inspect the contributors
Use Table for readable values, pitch dates and individual contributors. Open an observation to understand which pitch supplied it.
Use Evidence to inspect the saved annotated image associated with the selected result. Return to the original pitch when you need the video or marked frame. If evidence or a source pitch is unavailable, follow the displayed state rather than assuming the missing item was included.
Link to this step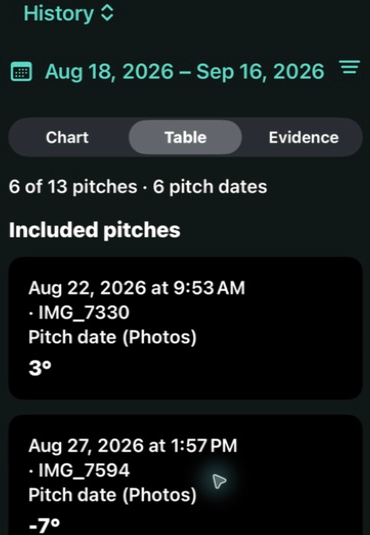
Step 8.8
Choose the question
The question menu changes what you are investigating. These views describe recorded data; they do not estimate improvement or prescribe targets.
- History: review individual observations over time.
- Two pitches: choose an exact A/B pair for one supported measurement.
- Grouped summary: compare groups using the available grouping, centre and weighting choices.
- Two periods: compare an earlier date interval with a later one; the earlier period must finish before the later period begins.
A numerical difference requires compatible recorded meanings. If a difference is unavailable, inspect the reason and the individual evidence. Filtering cannot make incompatible records comparable.
Link to this step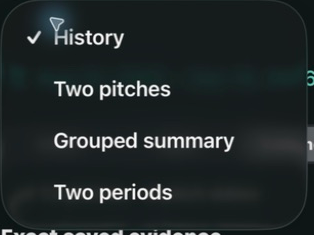
Step 8.9
Narrow the recorded context
Open Options and choose Camera View and Throwing side filters. Apply confirms the draft choices; Cancel leaves the current view unchanged.
For summaries, choose the centre, such as mean or median, and weighting. Each Pitch gives each included pitch weight. Each Pitch Date gives dates equal weight. A pitch date is not proof that all pitches came from one session.
Link to this step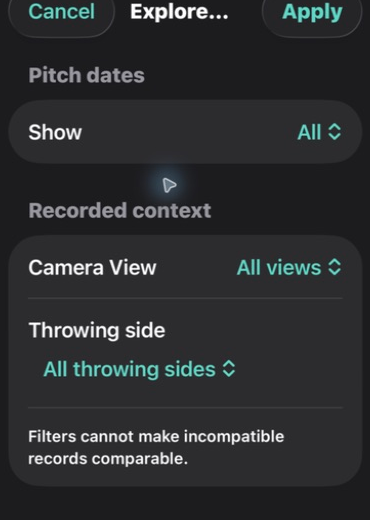
Step 8.10
Set the date window
Choose Last 7 days, Last 30 days, Last 90 days, All or Custom. Pitches without a pitch date have a separate choice. Check the date boundaries and the time zone used for the question.
Relative windows move with time. A custom range expresses specific dates. Inspect included pitch dates when a result or comparison seems unexpectedly empty.
Angle differences use degrees. Differences between percentage-valued ankle-span ratios use percentage points. Neither unit makes a difference evidence of improvement.
Link to this step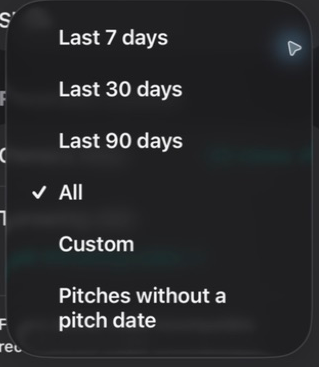
Step 8.11
Save a question you want to revisit
Use the view controls to Save as New View, give it a useful name, and save. Reopen a Saved View to restore its question, filters, event and exact pitch selections where applicable.
Update an existing view when you intend to replace its saved settings; Save as New keeps a separate view. Results refresh from current history, so a Saved View is not a frozen snapshot. Relative date windows stay relative. If a pinned pitch is no longer usable, select a replacement. Use Saved View actions to rename or delete a saved question; deleting a view does not delete its pitches.
Camera position, event marking and pose estimation affect comparisons. A recorded difference is descriptive; discuss its meaning with a coach.
Link to this step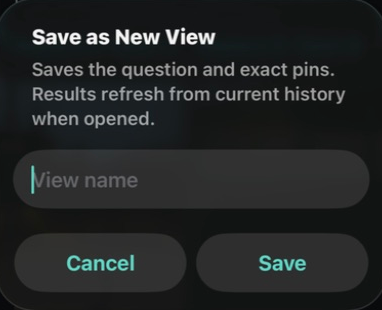
09 / Profile & Settings
Keep useful context close.
Profile information and app settings support the workflow. They are not measurement calibration.
In this module · 3 steps
Step 9.1
Optional Athlete Profile
Open Athlete Profile from My Pitches. Current fields include name, date of birth with derived age, throwing arm, batting side, and primary and secondary positions.
Height and weight support dated entries in metric or imperial units. Use Add Entry for a new measurement date. Use Correct Entry to correct an existing entry; Earlier Entries lets you review retained history.
Profile throwing arm can supply a default for new pitches. Confirm each pitch's saved value. Editing a profile does not retroactively alter old pitch inputs or calibrate the projected measurements.
Link to this stepStep 9.2
Settings, Privacy and Support
Open Settings from My Pitches. About shows the installed app and version. Privacy Policy explains data handling, and Support provides help and contact details.
Pitches and profile information are local to the app. Saving or sharing a copy is a deliberate action; review the destination and the information included.
Link to this step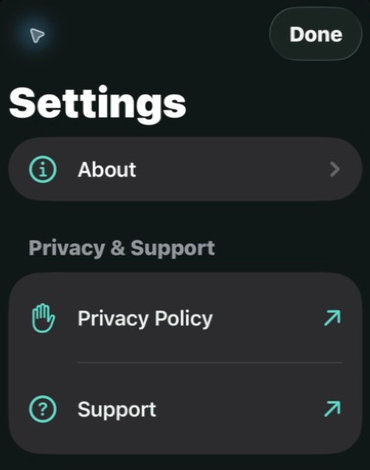
Step 9.3
Find the version before reporting an issue
In Settings → About, note the version and build shown on your device. Include them with the iPhone model, iOS version, exact message and the steps that led to the problem.
Link to this step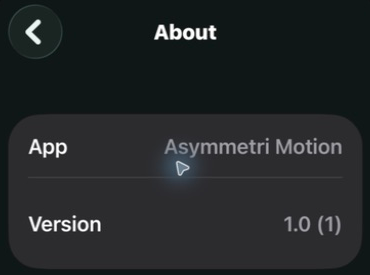
10 / Troubleshooting
Find the next useful check.
Open the category that matches what you see. Preserve your saved work while resolving the problem.
I can't record
Check Camera permission in iOS Settings and read the supported-camera message. Direct capture needs a compatible rear wide high-frame-rate mode. Permission cannot add unsupported hardware capability. Use Import Video if no suitable mode exists; keep enough storage and wait for saving to finish.
I can't import
Confirm that the original still exists in Photos and is included in limited access. For iCloud media, check the connection and wait for the original download. Check free storage, then retry. Use Open Existing Pitch if you meant to return to an already imported Photos item.
Set / Move or Analyze is unavailable
Pause playback, finish dragging and wait for the exact frame to load. Confirm Camera View, Throwing Arm and required marks. Side View needs a Setup Reference before FFC. Follow the displayed readiness message and explicitly choose Analyze Pitch when ready.
A result is unavailable or out of date
Read the individual result's reason. Confirm its event, view, throwing arm and visible landmarks. Review Pitcher Selection if requested. After changing inputs, explicitly analyze again. A missing landmark or unsuitable view may require a clearer source video; do not substitute an invented value.
More than one person is visible
Use Pitcher Selection when prompted. Adjust the region or choose the intended candidate, then save and explicitly retry. Edit or Clear a prior selection if needed. A spatial selection is not identity recognition and cannot guarantee a usable pose.
The Photos copy or evidence export failed
Check permission to add to Photos and available storage, then follow the retry message. A pitch successfully saved in My Pitches is separate from its Photos copy. Check the library before assuming that a Photos error lost the local pitch.
I need to change a permission
In iOS Settings, find Asymmetri Motion or use Privacy & Security → Camera / Photos. Enable the needed access; limited Photos access must include the chosen video. Parental controls or managed-device restrictions may require the device manager's help. You do not need to delete the app to change permissions.
History, evidence or a comparison is missing
Check the event or measurement, date window, camera view, throwing side and included count. Include unknown pitch dates if relevant. The chosen pair needs matching marks or compatible measurement records. Reopen each original pitch to inspect its saved inputs and current result. Replace missing Saved View selections when asked.
Step 10.1
When you need more help
Start with a written description of the problem, what you expected and the exact message shown. A video is not required to ask for help. Screenshots or clips are optional; remove unnecessary personal information and share only material you are authorized to send.
Use the support page for more detailed guidance. Avoid deleting the app or local pitches as a routine fix.
Link to this stepNeed a hand?
Use the support guide or revisit how Motion handles your data.
For the normal V1 iPhone workflow. App screenshots show real retained pitching media used with the owner's permission. Physical setup images are instructional illustrations. Screen details may vary by version. Asymmetri Motion for iPhone is preparing for release.